PURPOSE This Standard Operating Procedure (SOP) provides detailed instructions for installing and configuring the SmartVault Server application. SmartVault is a cloud-based document management and backup solution that ensures data security and accessibility for Multani Pharmaceuticals Ltd (Delhi).
SCOPE This SOP covers:
• SmartVault Server software download and installation
• Initial server configuration and setup
• User authentication and login procedures
• Dashboard navigation and functionality
• Server monitoring and management features
RESPONSIBILITIES IT Administrator:
• Install and configure SmartVault Server software
• Monitor server performance and backup status
• Manage user access and permissions
• Troubleshoot system issues
PREREQUISITES Before beginning the installation, ensure the following requirements are met:
4.1 Hardware Requirements • Minimum 507.5 MB of free disk space for installation
• Recommended: 32+ TB total storage capacity for backup data
• Minimum 64 GB RAM (recommended for enterprise deployments)
• Intel Xeon or equivalent processor
4.2 Software Requirements • Microsoft Windows Server 2022 Standard or later
• Administrator privileges on the server
• Active internet connection
4.3 Information Required • Company ID (provided by SmartVault)
• Company Name
• Registered email address
• Administrator password
INSTALLATION PROCEDURE Step 1: Download SmartVault Server Application 1. Navigate to the official SmartVault website or authorized download portal.
2. Download the SmartVault - Server installation file (Smart Vault - Server.exe).
3. The file size is approximately 121,208 KB (121 MB).
4. Save the file to your Downloads folder or a location of your choice.
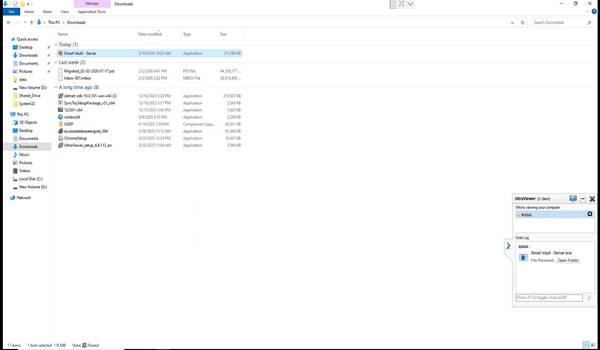
Figure 1: SmartVault Server Installation File in Downloads Folder
Step 2: Launch the Installation Wizard 1. Double-click the Smart Vault - Server.exe file to launch the installation wizard.
2. If prompted by User Account Control (UAC), click 'Yes' to allow the installer to make changes.
3. The Setup wizard will display 'Smart Vault - Server version 1.5'.
Step 3: Select Installation Location
1. The installation wizard will prompt you to select the destination folder.
2. Default installation path: C:\Program Files\SmartVault\Server
3. Ensure at least 507.5 MB of free disk space is available at the selected location.
4. To change the installation path, click 'Browse' and select an alternative location.
5. Click 'Next' to continue.
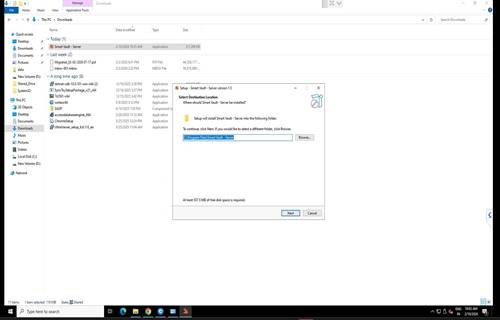
Figure 2: Select Installation Location
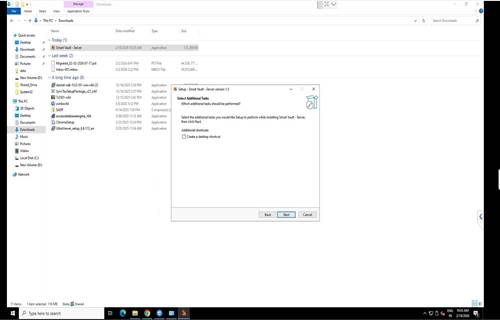
Step 4: Select Additional Tasks 6. The wizard will display optional additional tasks.
7. Check the box 'Create a desktop shortcut' if you want quick access to SmartVault Server.
8. Click 'Next' to proceed.
Step 5: Ready to Install - Confirmation 1. Review the installation summary on the 'Ready to Install' screen.
2. Verify the following details:
• Destination location: C:\Program Files\SmartVault\Server
• Additional shortcuts: Create a desktop shortcut
3. If you need to make changes, click 'Back'.
4. Click 'Install' to begin the installation process.
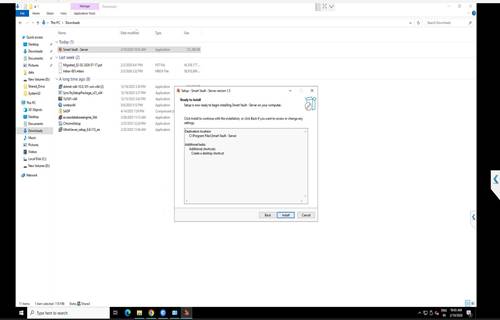
Figure 4: Ready to Install Confirmation Screen
Step 6: Installation in Progress 1. The installation wizard will extract and install all necessary files.
2. Wait for the progress bar to complete. This may take 2-5 minutes depending on system performance.
3. Do not interrupt the installation process or restart the computer.
Step 7: Complete Installation 1. Once installation is complete, the 'Completing the Smart Vault - Server Setup Wizard' screen will appear.
2. Check the box 'Launch Smart Vault - Server' to automatically start the application after closing the wizard.
3. Click 'Finish' to exit the setup wizard.
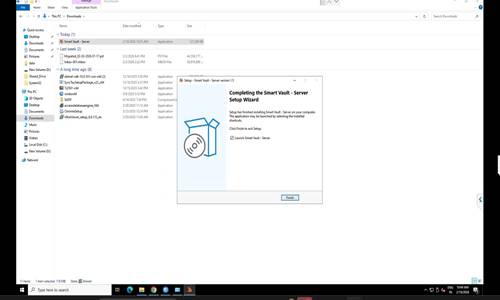
Figure 5: Installation Complete - Setup Wizard
6. INITIAL CONFIGURATION AND LOGIN Step 8: First Launch - Dashboard Overview 1. Upon first launch, the SmartVault Server dashboard will open.
2. The dashboard displays the company branding and tagline: 'Ab Data Loss Ka Koi Chance Nahi' (Now No Chance of Data Loss).
3. The top menu bar includes the following options:
• Dashboard
• Ping Details
• Backup Statistics
• Company Profile
• Contact Us
• Backup History
4. The Company ID is displayed in the top bar (e.g., MPLUAAACM25031K).
5. Click 'Login' in the top-right corner to access server management features.
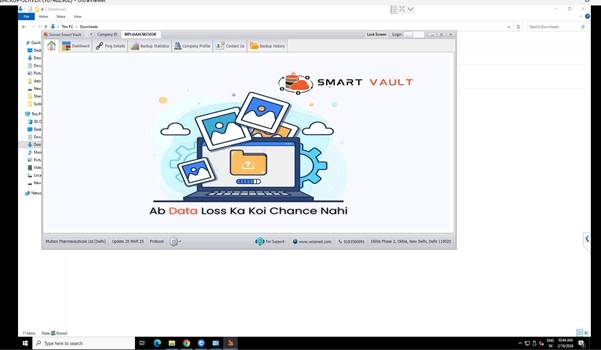
Figure 6: SmartVault Server Dashboard - First Launch
Step 9: User Login 1. Click the 'Login' button in the top-right corner of the dashboard.
2. The login page will appear with the following fields:
• Company ID
• Company Name
• Email Address
• Password
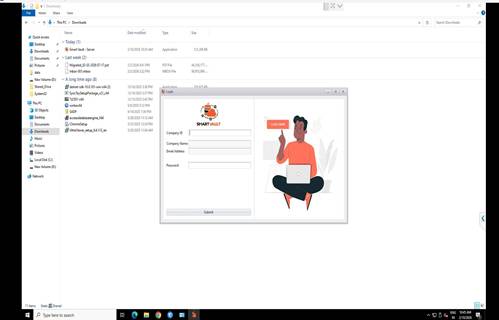
Figure 7: Login Page
Step 10: Enter Login Credentials Enter the following information in the respective fields:
| Field | Example Value |
|---|---|
| Company ID | MPLUAAACM25031K |
| Company Name | Multani Pharmaceuticals Ltd (Delhi) |
| Email Address | info@multani.org |
| Password | Multani@123 (example) |
Note: Use the credentials provided by your SmartVault administrator.
1. After entering all credentials, click the 'Submit' button.
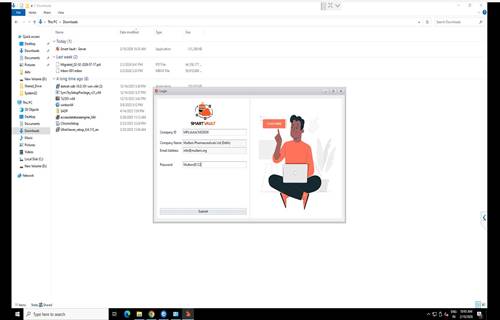
Figure 8: Login Credentials Entry
7. SERVER DASHBOARD AND FEATURES
Step 11: Access the Main Dashboard
1. After successful login, you will be redirected to the main dashboard.
2. The dashboard displays comprehensive server information including:
• System Information:
- System Name: BACKUP-SERVER
- OS Name: Microsoft Windows Server 2022 Standard
- User Name: Administrator
- Brand Name: HPE
- Processor: Intel(R) Xeon(R) Silver 4210R CPU @ 2.40GHz
• Storage Information:
- Total Server Storage Size: 32.74 TB
- Used: 30.36 TB (92.71%)
- Free: 2.39 TB (7.29%)
- Storage Path: D:\SMART-VAULT
- Path Size: 335.97 GB
• System Resources:
- Total RAM: 63.67 GB
3. The dashboard also displays 'Recent Today Inactive Clients' showing client connection status.
4. Click the 'Refresh' button in the top-right to update the dashboard information.
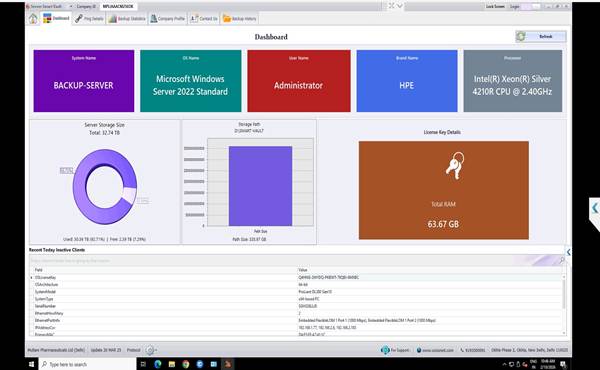
Figure 9: Main Dashboard with System Information
MONITORING AND MANAGEMENT FEATURES 8.1 Ping Details - System Status Monitoring The Ping Details screen allows you to monitor the connectivity status of all client systems in your network.
1. Click 'Ping Details' from the top menu bar.
2. The screen displays a comprehensive table with the following information:
• Client Name - Name of the connected system
• IP Machine - IP address of the client
• Ping Status - Success (green) or Failed (red)
• Response Time (ms) - Network latency
• Entry Date Time - When the client was added
• Errors - Any connection errors or timeout messages
• Last Success Ping - Timestamp of last successful connection
• Company Id - Associated company identifier
• License Key - Client license information
3. Summary statistics are displayed at the bottom:
• Total Count: Total number of registered clients
• Total Success: Number of clients with successful ping
• Total Failed: Number of clients with failed ping
4. Use the 'Show Today Entries' and 'Show All Entries' buttons to filter the view.
5. Click 'Refresh' to update the ping status in real-time.
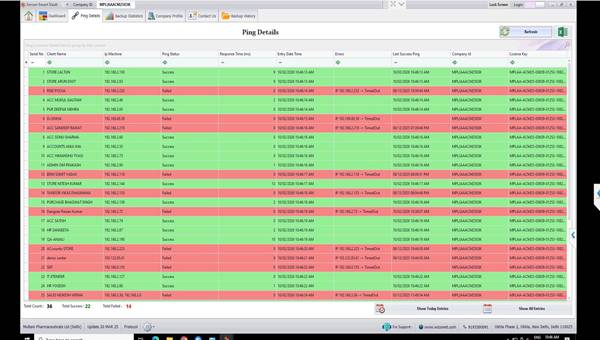
Figure 10: Ping Details - System Status Overview
8.2 Backup Statistics The Backup Statistics screen provides detailed information about backup storage usage for each client system.
1. Click 'Backup Statistics' from the top menu bar.
2. The screen displays a table with the following columns:
• Serial No. - Sequential client number
• Client Name - Name of the backed-up client
• Base Folder Path - Storage location on the server (e.g., D:\SMART-VAULT\CLIENT_NAME)
• Folder Data Size - Total size of backup data
• Last Modified Date Time - When the backup was last updated
• Latest Modified File Path - Most recently modified file in the backup
• Today Modified Size - Amount of data modified today
3. At the bottom of the screen:
• Total Count: Number of clients with active backups
• Total Data Backup: Cumulative size of all backup data (e.g., 335.98 GB)
4. Click 'Refresh' to update the statistics.
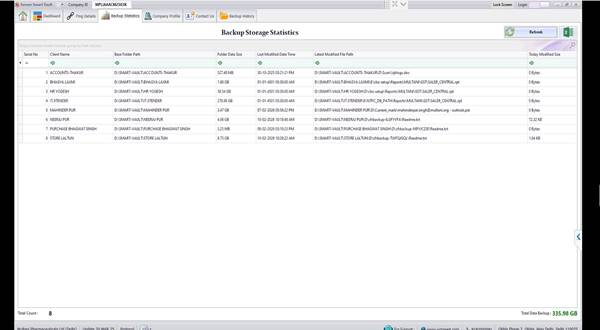
Figure 11: Backup Statistics Overview
8.3 Company Profile The Company Profile screen displays registered company information and account details.
1. Click 'Company Profile' from the top menu bar.
2. The following information is displayed:
| Field | Information |
|---|---|
| Company Name | Multani Pharmaceuticals Ltd (Delhi) |
| Company ID | MPLUAAACM2503K |
| Address | Okhla Phase 2, Okhla, New Delhi, Delhi 110025 |
| info@multani.org | |
| PAN | AAACM2503K |
| GSTIN | 07AAACM2503K1ZR |
| Plan Type | Enterprise |
| Industry Type | Healthcare |
| Status | Active |
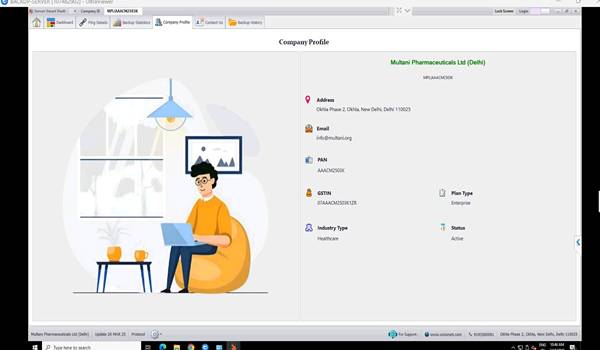
Figure 12: Company Profile Information
8.4 Contact Us - Technical Support The Contact Us page provides technical support information and a contact form for assistance.
1. Click 'Contact Us' from the top menu bar.
2. The following support information is displayed:
Support Contact Details: • Address:
S1, Masharpur Roorkee, Near HDFC Bank Bhagirathpur,
Haridwar, Uttarakhand – 247661, India
• Phone:
Mobile: +91 92582 99518
• Working Time:
Monday - Saturday: 09:00AM - 06:00PM
Sunday: Closed
Support: 24/7
Contact Form Fields:
• Your Name
• Phone No.
• Subject
• Message (text area for detailed inquiry)
3. Fill in all required fields and click 'Send Mail' to submit your inquiry.
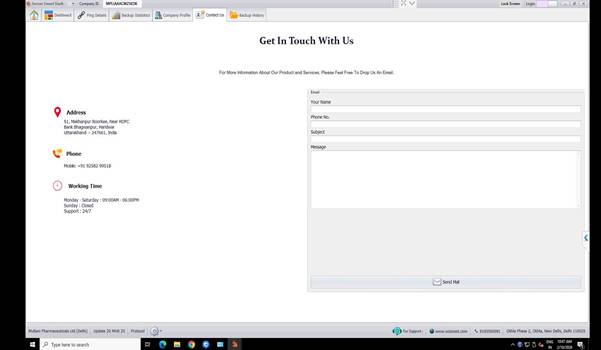
Figure 13: Contact Us - Technical Support Page
8.5 Backup History The Backup History screen provides a detailed log of all backup operations performed on specific dates.
1. Click 'Backup History' from the top menu bar.
2. Select a date using the 'Choose Date' dropdown calendar.
3. Click 'Show' to display backup history for the selected date.
4. The table displays the following information:
• S.No - Serial number
• Client Name - Name of the backed-up client system
• Path - Backup storage location
• Files - Number of files backed up
• Size - Total size of backed-up files
• First Modified Date Time - When the backup started
• Last Modified Date Time - When the backup completed
• Selected Date - Date of the backup operation
5. Summary information is displayed at the bottom:
• Total Modified Files - Total number of files modified on the selected date
• Total Modified Date Size - Total size of modified data (e.g., 73.35 KB)
6. Use the 'Find' search box to filter results by client name.
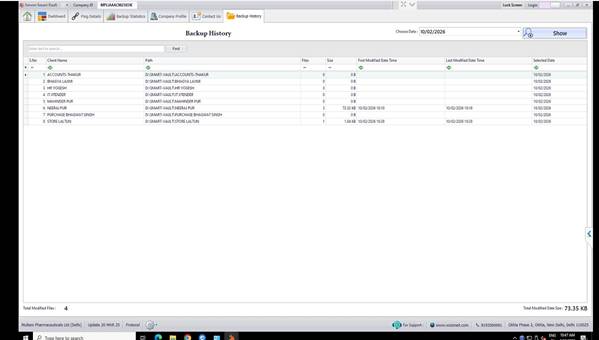
Figure 14: Backup History Overview
TROUBLESHOOTING
| Issue | Solution |
|---|---|
| Installation fails - insufficient disk space | Free up at least 507.5 MB of disk space and retry installation |
| Unable to login | Verify Company ID, email, and password. Contact SmartVault support if credentials are forgotten |
| Client systems showing 'Failed' ping status | Check network connectivity, firewall settings, and ensure client software is running |
| Dashboard not displaying updated information | Click the 'Refresh' button. If issue persists, restart the SmartVault Server application |
| Storage space running low | Review Backup Statistics to identify large backups. Archive or remove old backup data as per retention policy |
| Server application not launching | Restart the server. Check Windows Event Viewer for errors. Reinstall if necessary |
10. BEST PRACTICES 1. Regular Monitoring: Check the dashboard daily to monitor system health and storage capacity.
2. Ping Status Review: Review Ping Details regularly to identify offline or disconnected clients.
3. Backup Verification: Verify backup completion through Backup History on a weekly basis.
4. Storage Management: Maintain at least 10% free storage space to ensure optimal performance.
5. Security: Change default passwords immediately after installation. Use strong passwords with a minimum of 12 characters.
6. Access Control: Limit server access to authorized IT personnel only.
7. Updates: Keep the SmartVault Server software updated to the latest version for security and feature enhancements.
8. Documentation: Maintain records of all configuration changes and backup operations.
9. Disaster Recovery: Implement a secondary backup solution for critical server data.
10. Performance Monitoring: Monitor server CPU and RAM usage to prevent performance degradation.
SMART VAULT DESKTOP
STANDARD OPERATING PROCEDURE
Smart Vault Desktop Application
Installation and Configuration Guide
| Document Title: | Smart Vault Desktop Application - Installation & Configuration SOP |
|---|---|
| Version: | 1.0 |
| Date: | February 10, 2026 |
| Application: | Smart Vault Desktop v3.1f |
PURPOSE This Standard Operating Procedure (SOP) provides detailed instructions for installing and configuring the Smart Vault Desktop Application on client systems. The Smart Vault Desktop Application enables real-time data backup from client workstations to the company's local server infrastructure.
PREREQUISITES Before beginning the installation process, ensure the following requirements are met:
• Smart Vault Server Application must be installed and running on the local server
• Server IP address and credentials must be available
• Client workstation must have Windows operating system installed
• Administrative privileges on the client workstation
• Network connectivity between client workstation and local server
• Smart Vault Desktop Application installer file (smartvault-v3.1f)
INSTALLATION PROCEDURE 4.1 Download the Desktop Application 1. Navigate to the software repository location on your network or download source
2. Locate the Smart Vault Desktop Application installer file: smartvault-v3.1f
3. Copy the installer to a local directory on the client workstation (e.g., Downloads folder)
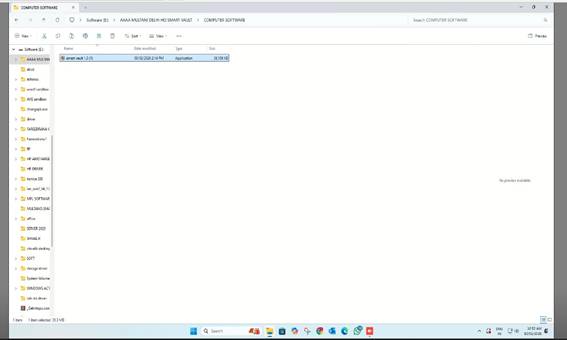
Figure 1: Locate the Smart Vault installer file (smartvault-v3.1f)
4.2 Launch the Installation Wizard 1. Double-click the smartvault-v3.1f application file to launch the installer
2. If prompted by User Account Control (UAC), click 'Yes' to allow the installation
3. The Smart Vault Setup Wizard will open
4.3 Select Destination Location 4. The 'Select Destination Location' dialog will appear
5. Default installation path: C:\Users\[USERNAME]\AppData\Local\Programs\Smart Vault
6. To change the installation location, click 'Browse' and select an alternative directory
7. Note: At least 1,755.9 MB of free disk space is required
8. Click 'Next' to continue
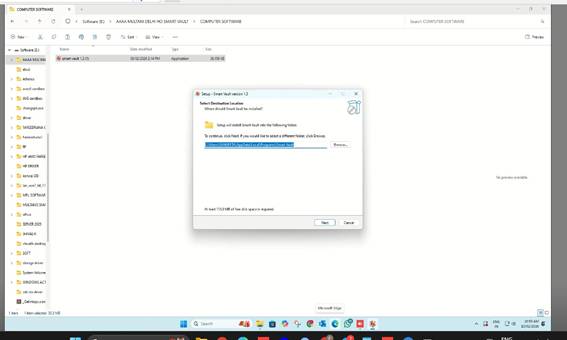
Figure 2: Select Destination Location screen
4.4 Select Additional Tasks 1. The 'Select Additional Tasks' screen will display
2. Check the box for 'Create a desktop shortcut' if you want quick access to the application (recommended)
3. Click 'Next' to proceed
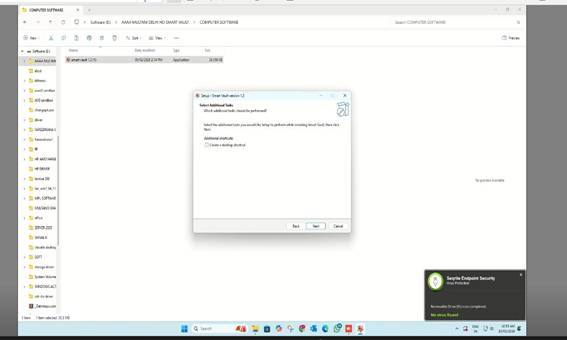
Figure 3: Select Additional Tasks screen
4.5 Ready to Install 4. Review the installation settings displayed on the 'Ready to Install' screen
5. Verify the destination folder path is correct
6. Click 'Install' to begin the installation process
7. If you need to make changes, click 'Back' to return to previous screens
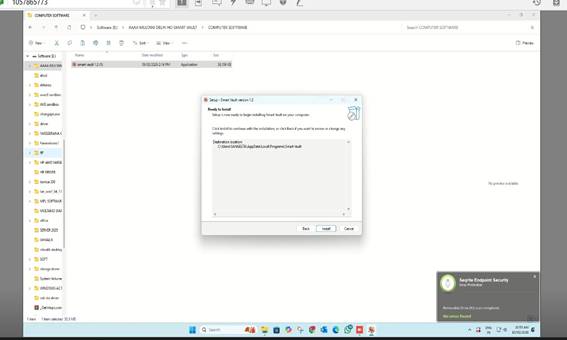
Figure 4: Ready to Install confirmation screen
4.6 Installation Progress 8. The installation wizard will display the progress bar
9. Wait for the installation to complete (typically 2-5 minutes depending on system performance)
10. Do not close the installer or restart the computer during this process
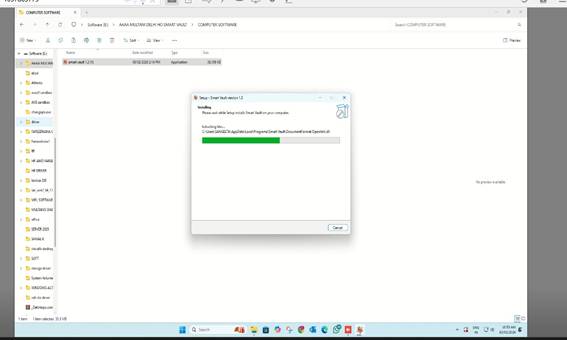
Figure 5: Installation in progress
4.7 Complete the Installation 11. Once installation is complete, the 'Completing the Smart Vault Setup Wizard' screen will appear
12. Ensure the 'Launch Smart Vault' checkbox is selected
13. Click 'Finish' to close the installer and launch the application
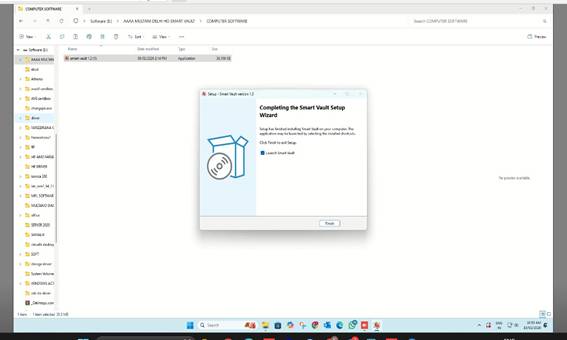
Figure 6: Completing the Smart Vault Setup Wizard
CONFIGURATION PROCEDURE 5.1 Access the Application from System Tray 14. After launching, the Smart Vault application will run in the system tray (bottom-right corner of the taskbar)
15. Locate the Smart Vault icon in the system tray
16. Right-click on the Smart Vault icon
17. Select 'Settings' from the context menu
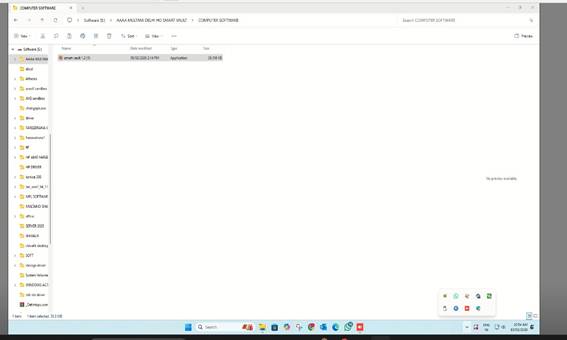
Figure 7: Smart Vault icon in system tray
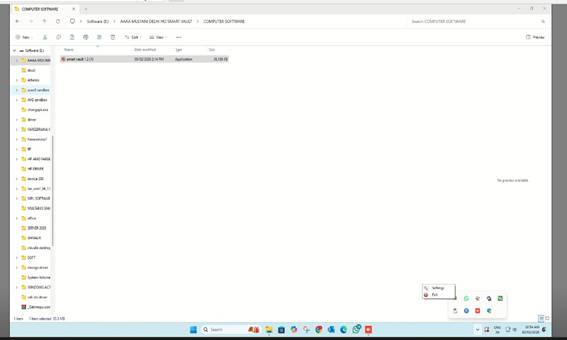
Figure 8: Right-click menu - Select Settings
5.2 Authentication 18. The 'Authentication Window' will appear
19. Enter the administrator credentials:
• Username: Enter the designated username (e.g., Admin)
• Password: Enter the corresponding password
20. Click 'Authenticate' to proceed
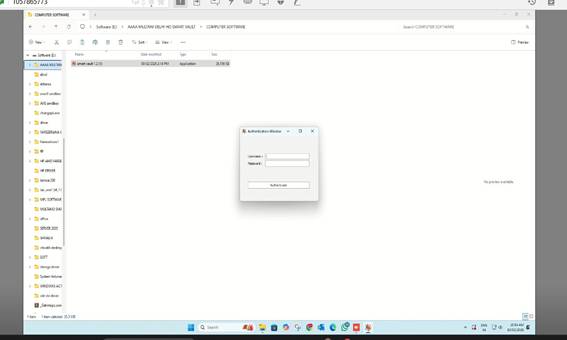
Figure 9: Authentication Window
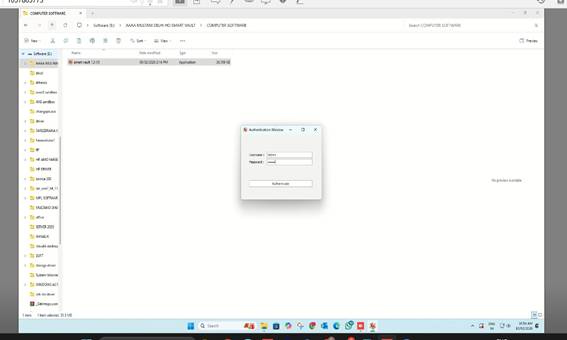
Figure 10: Enter credentials and authenticate
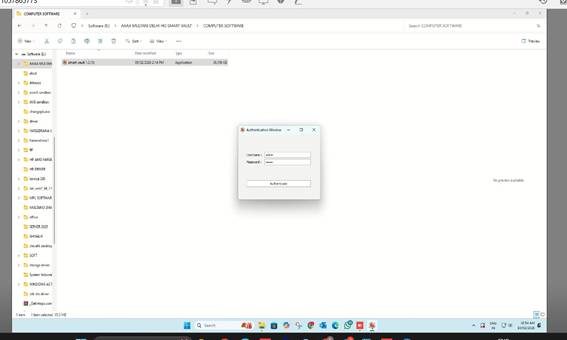
Figure 11: Credentials entered
5.3 Main Configuration Interface Upon successful authentication, the main Smart Vault configuration window will open. This interface is divided into several sections:
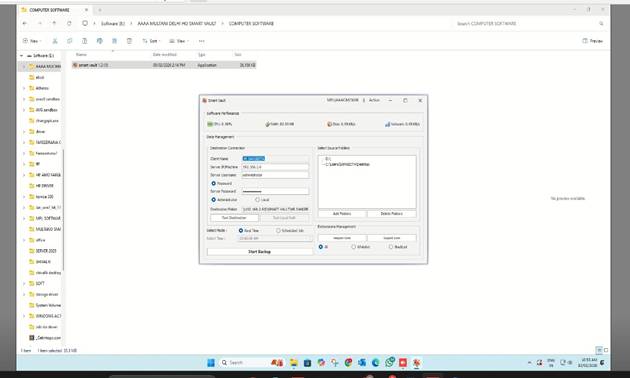
Figure 12: Main Smart Vault configuration interface
Software Performance This section displays real-time system metrics:
• CPU Usage: Current processor utilization percentage
• Disk I/O: Disk read/write activity in MB/s
• Network: Network transfer speed in KB/s
Data Management - Destination Connection IMPORTANT: If the Smart Vault Server Application is properly configured on the local server, the following details will be automatically fetched and populated:
• Client Name: Automatically populated based on the client system
• Server IP/Machine: The IP address of the local server (e.g., 192.168.2.6)
• Server Username: The username for server authentication (e.g., administrator)
• Server Password: Pre-configured password (displayed as asterisks)
• Authentication Mode: Select either 'Password' or 'Administrator' as required
• Destination Folder: The backup storage path on the server
5.4 Select Source Folders for Backup 21. In the 'Select Source Folders' section, click 'Add Folders'
22. A file browser window will open
23. Navigate to and select the drives or folders you want to backup to the local server
24. Common selections include:
• C:\ (Local Disk)
• D:\ (Additional drives)
• Specific user folders (Documents, Desktop, etc.)
25. Click 'OK' to confirm the folder selection
26. A confirmation dialog 'Destination folder created' will appear - click 'OK'
27. Selected folders will appear in the source folders list
28. To remove folders, select them and click 'Delete Folders'
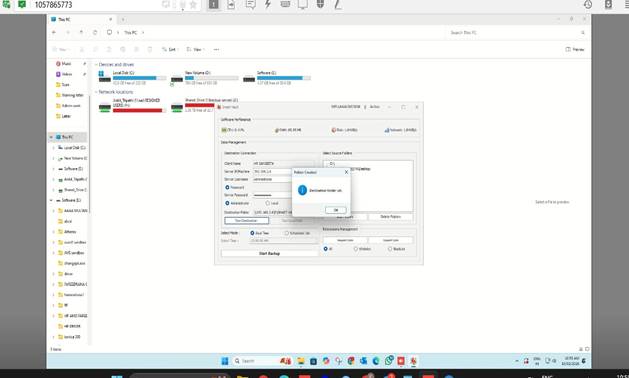
Figure 13: Adding source folders for backup
5.5 Select Backup Mode Choose the appropriate backup mode:
• Real Time: Recommended for continuous backup. Changes are backed up immediately as they occur.
• Scheduled Job: Set a specific time for daily backups (e.g., 12:00:00 AM)
5.6 Extension Management (Optional) Configure file type filtering:
• Import Extn: Specify file extensions to include in backup
• Export Extn: Save current extension settings
• Filter Options: Select 'All' to backup all file types, 'Whitelist' to include only specific types, or 'Blacklist' to exclude specific types
5.7 Start the Backup Process 29. After configuring all settings, click the 'Start Backup' button
30. The backup process will begin immediately
31. Data from selected folders will start backing up to the local server in real-time (if Real Time mode is selected)
32. Monitor the Software Performance section to view backup activity
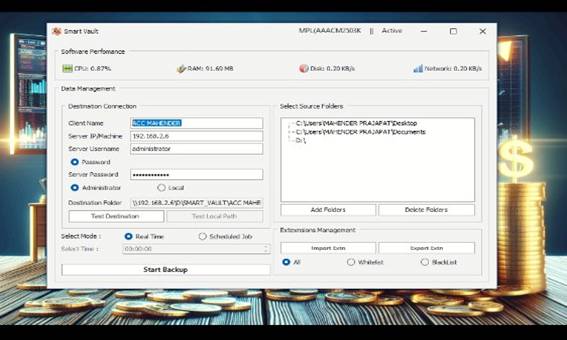
Figure 14: Click Start Backup to begin the backup process
6. POST-INSTALLATION NOTES IMPORTANT: The Smart Vault Desktop Application configuration is a one-time process.
• Once configured and backup is started, the application will run automatically in the background
• The application will start automatically on system startup
• No manual intervention is required after system restart or shutdown
• The application continues to run even when the configuration window is closed
• To access settings again, right-click the system tray icon and select 'Settings'
7. VERIFICATION STEPS To verify successful installation and configuration:
33. Check that the Smart Vault icon is visible in the system tray
34. Right-click the icon and verify 'Settings' and 'Exit' options are available
35. Open Settings and confirm all configuration details are correctly saved
36. Monitor the Software Performance metrics to ensure backup activity is occurring
37. Verify on the server that a destination folder has been created for this client
38. Test file creation: Create a test file in a backed-up folder and verify it appears on the server
TROUBLESHOOTING
| Issue | Resolution |
|---|---|
| Authentication fails | Verify username and password are correct. Ensure the Smart Vault Server Application is running. Check network connectivity to the server. |
| Server details not auto-populated | Confirm Smart Vault Server Application is properly configured on the local server. Verify network connection. Manually enter server details if automatic detection fails. |
| Backup not starting | Ensure folders are selected in the Source Folders section. Verify backup mode is selected. Check that 'Start Backup' button has been clicked. Review server connection status. |
| Application not in system tray | Click the up arrow in the system tray to show hidden icons. If still not visible, relaunch the application from Start Menu or desktop shortcut. |
| High CPU or network usage | This is normal during initial backup of large amounts of data. Monitor the Software Performance section. Usage should decrease after initial sync is complete. |
| Installation fails | Ensure you have administrative privileges. Verify sufficient disk space (minimum 1.75 GB). Temporarily disable antivirus software. Check Windows Event Viewer for error details. |
9. SUPPORT AND ESCALATION For issues not resolved through troubleshooting:
• Contact the IT Help Desk with details of the issue
• Provide the following information:
• Client system name and IP address
• Server IP address
• Error messages or screenshots
• Steps taken before the issue occurred
• Check application logs located in the installation directory for diagnostic information
--- END OF DOCUMENT ---
SYSTEM ISSUES
WINDOWS INSTALLATION
WINDOWS PENDRIVE MAKING ALSO CALLED BOOTABLE PENDRIVE
WINDOWS PENDRIVE 2 TARAH KI BANTI HAI EK GPT OR EK MBR .. HUM GPT HI USE KARTE HAI MOSTLY BAHUT RARE CASE HOTA HAI KE MBR BANAYE
MBR BANANE KI NEED TAB PADTI HAI JAB WINDOW INSTALL KARTE HUE LIKHA AAYE KE YOU HAVE TO CONVERT OR BOOT THE PENDRIVE INTO MBR MODE
PENDRIVE BANANE KE LIYE RUFUS KA USE KAREGE
HOW TO DOWNLOAD RUFUS

SEARCH RUFUS ON GOOGLE CHROME VISIT FIRST LINK i.e. https://rufus.ie/
NOW BELOW SCREEN WILL APPEAR
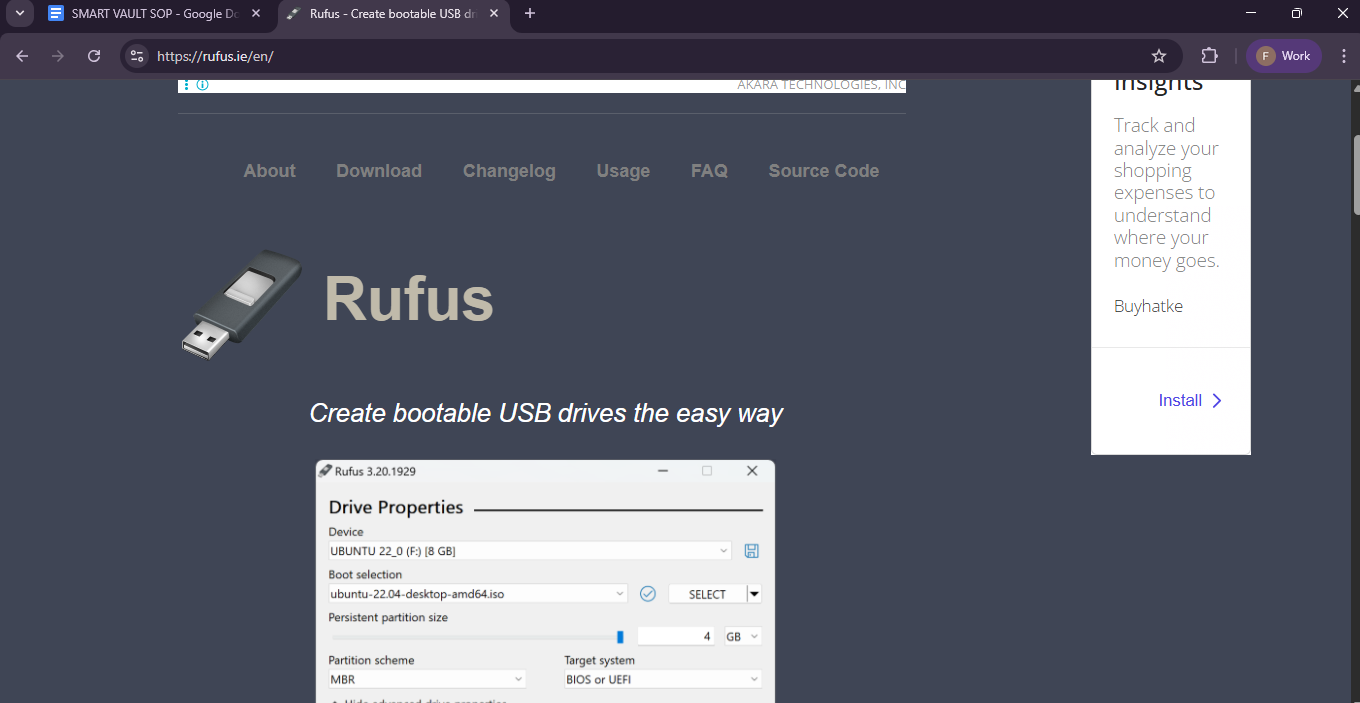
CLICK ON DOWNLOAD
AFTER CLICKING DOWNLOAD THIS SCREEN WILL SHOW
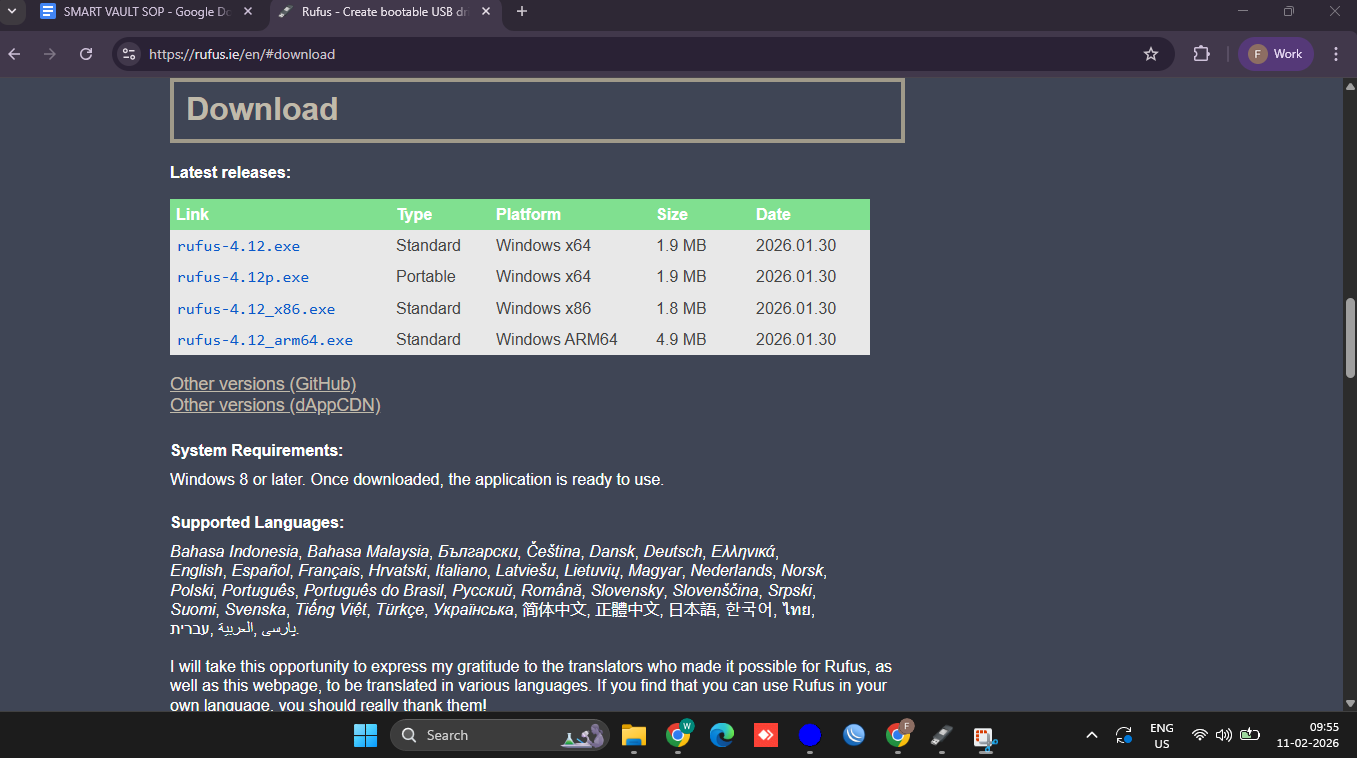
NOW CLICK rufus-4.12.exe
AFTER CLICKING IT WILL BE START DOWNLOADING.
AFTER DOWNLOADING IT YOU GO TO DOWNLOAD FOLDER AND RUN THE APPLICATION

AFTER RUNNING
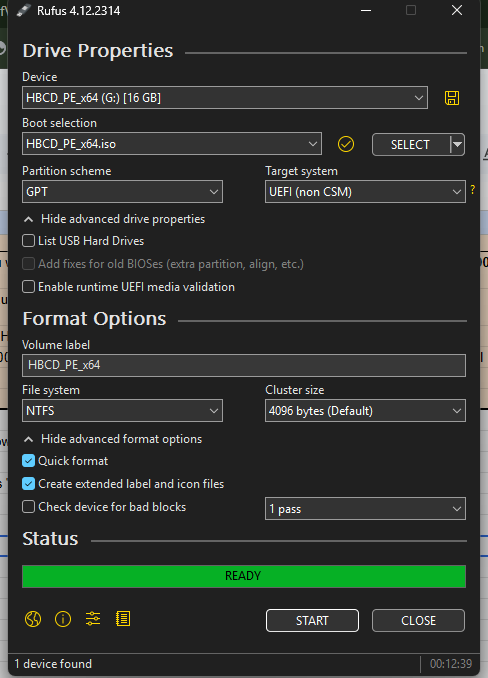
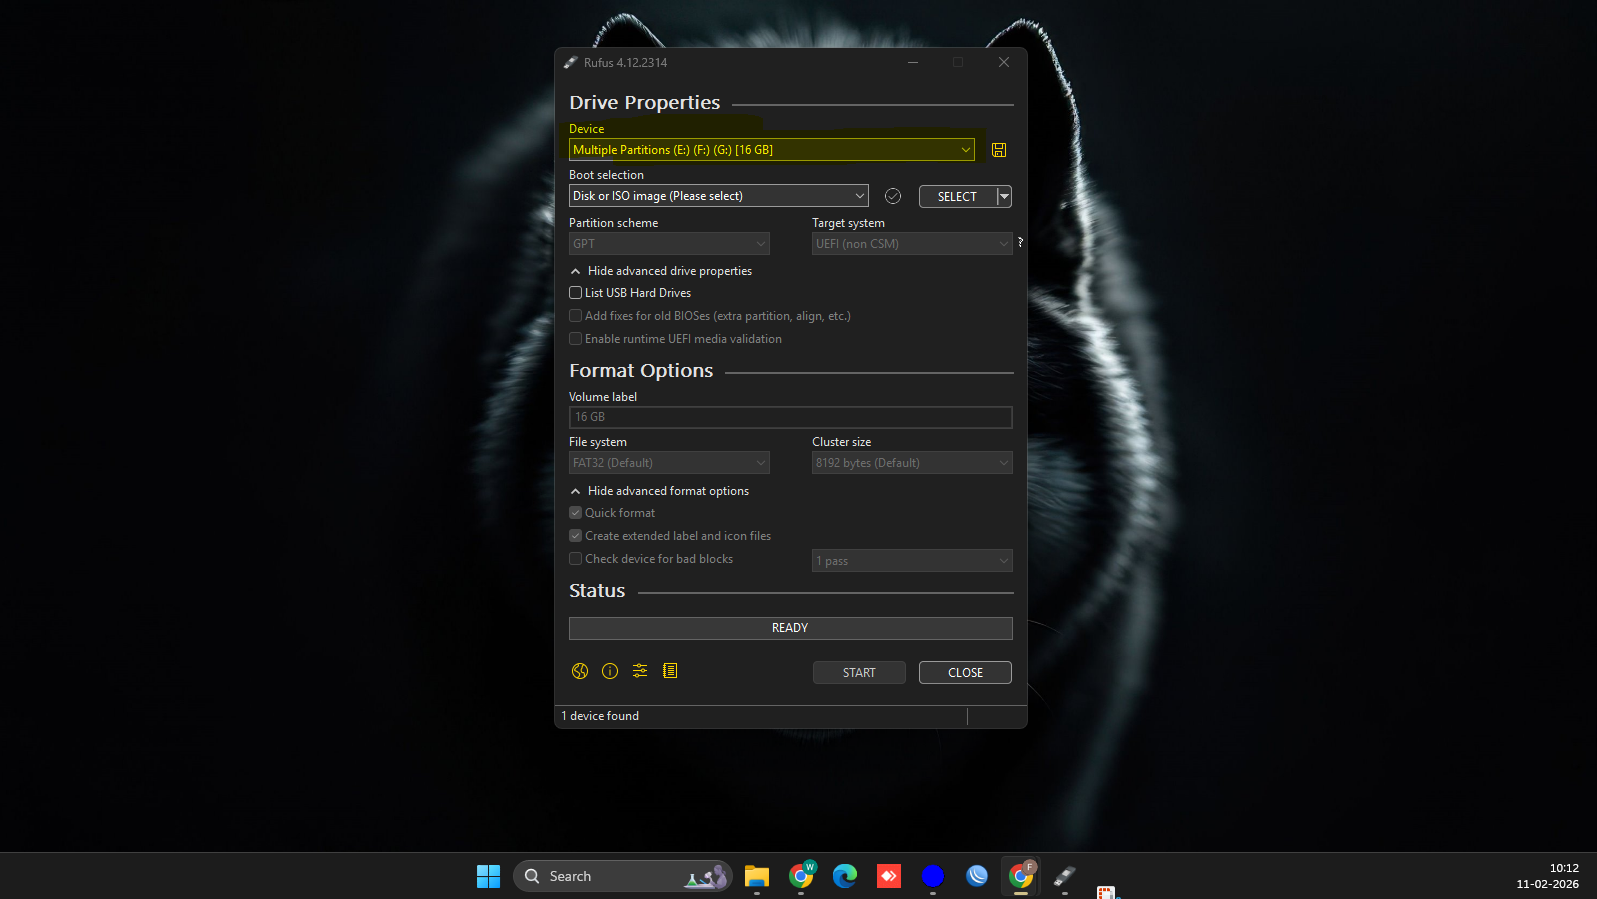
THIS SCREEN WILL SHOW
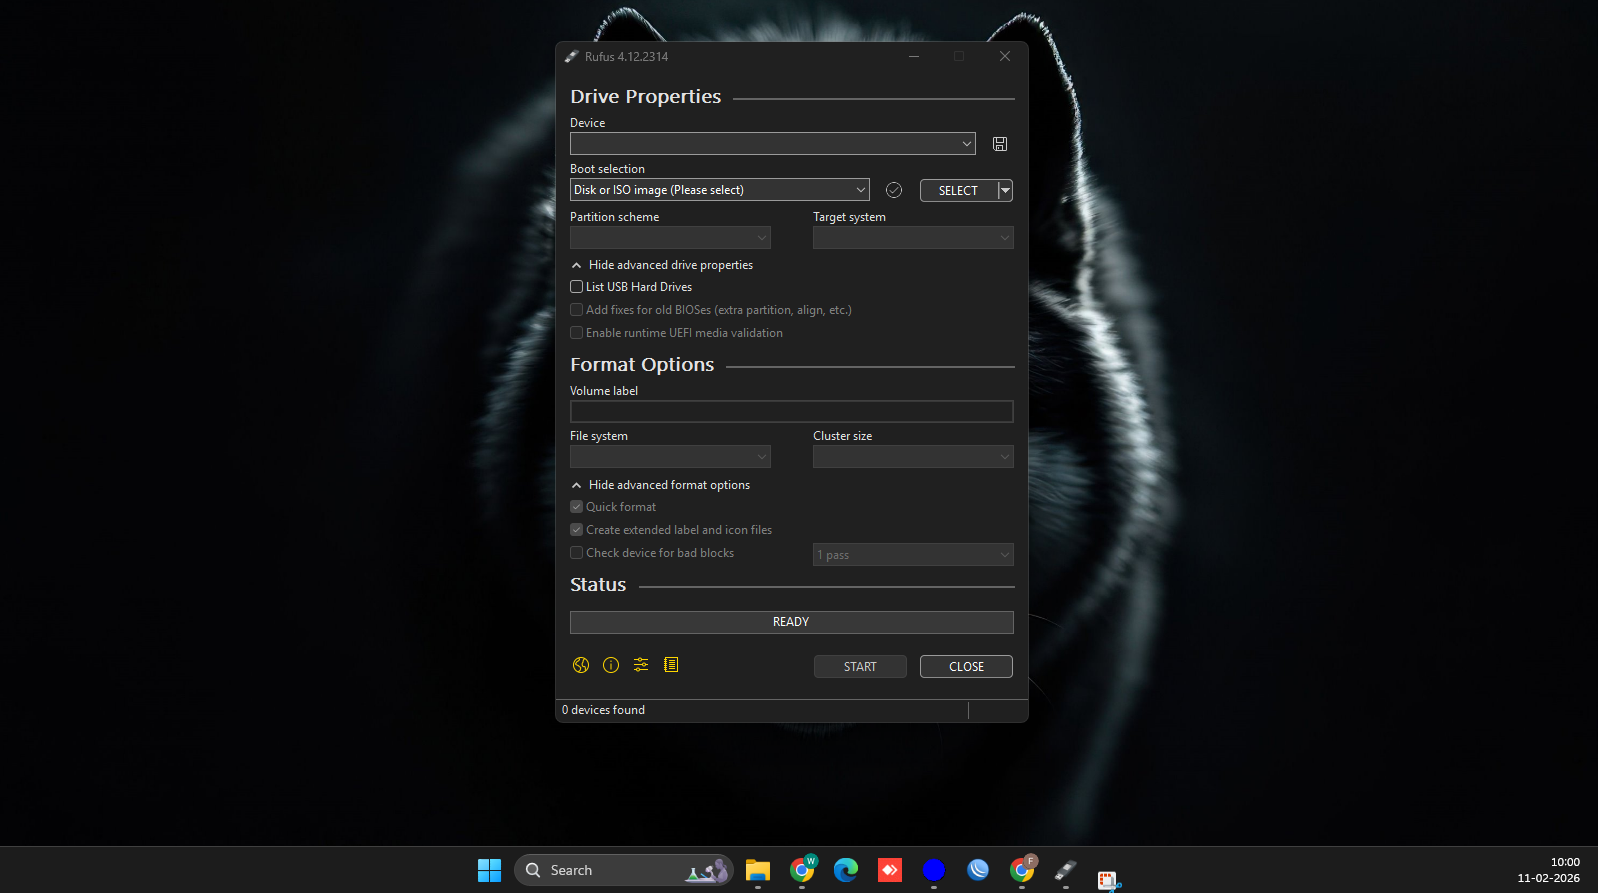
NOW INSERT THE PENDRIVE WHICH YOU WANT TO MAKE BOOTABLE. AFTER INSERTING THIS SOFTWARE SHOULD DETECT PENDRIVE LIKE THIS SHOWN IN IMAGE BELOW.
AFTER INSERTING THE PENDRIVE SELECT ISO FILE TO BOOT CLICK ON “SELECT”
AND GO TO DRIVE WHERE ISO FILE IS SAVE IN COMPUTER LIKE THIS IMAGE BELOW
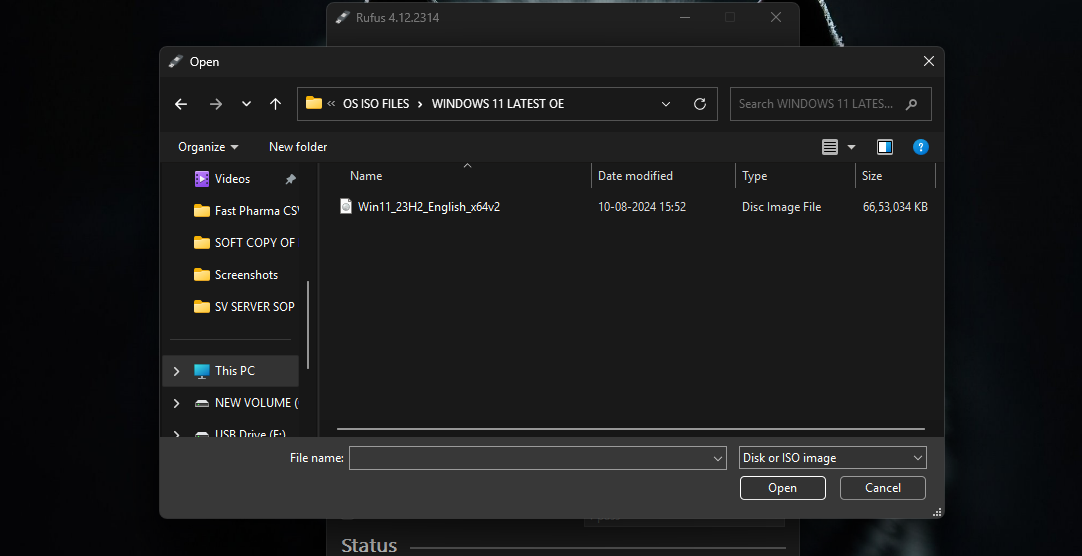
SELECT ISO FILE AND CLICK OPEN
NOW SELECT GPT AND MBR OPTION BY CLICKING “PARTITION SCHEME”
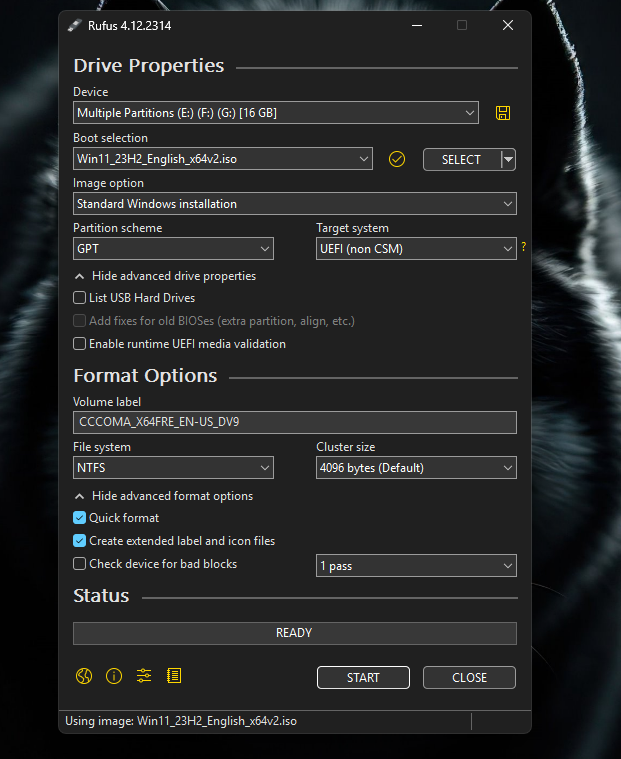
UNLESS MBR REQUIREMENT YOU WILL ALWAYS BOOT PENDRIVE IN GPT MODE
AFTER SELECT GPT NO NEED TO CHANGE ANYTHING JUST CLICK START
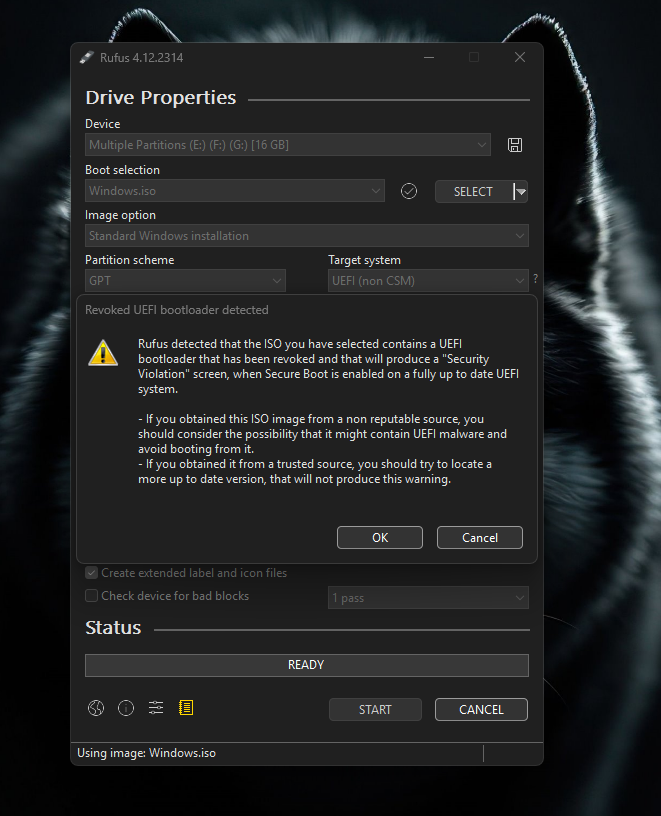
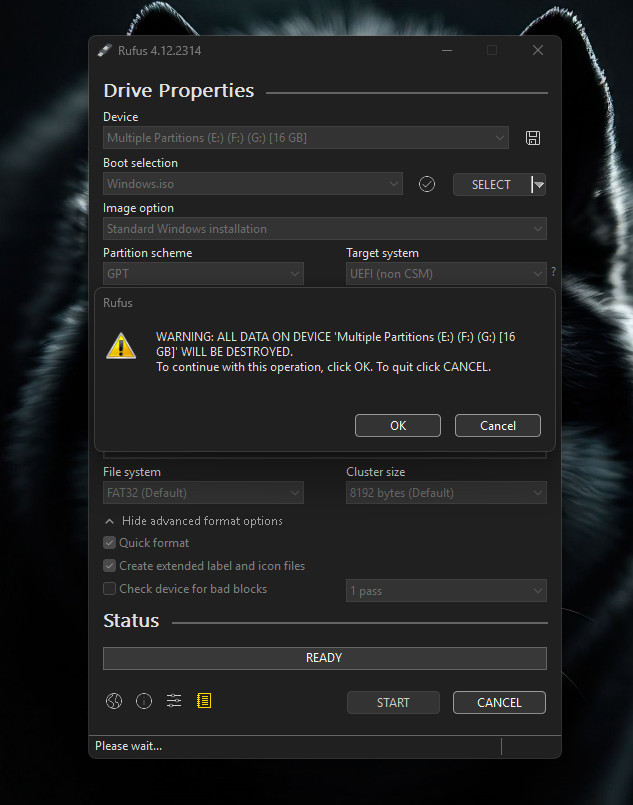
AFTER CLICKING START THIS POP UP MAY SHOW CLICK OK
AFTER CLICKING OKAY THIS POP UP WILL SHOW WHICH WILL ASK TO FORMAT PENDRIVE
DO NOT CHECK ANY BOX ON THIS DIALOGUE BOX
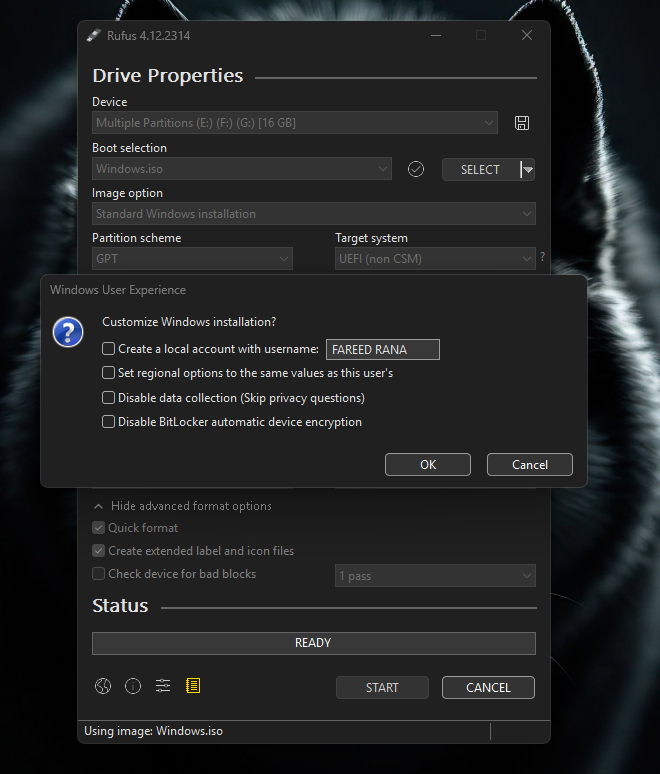
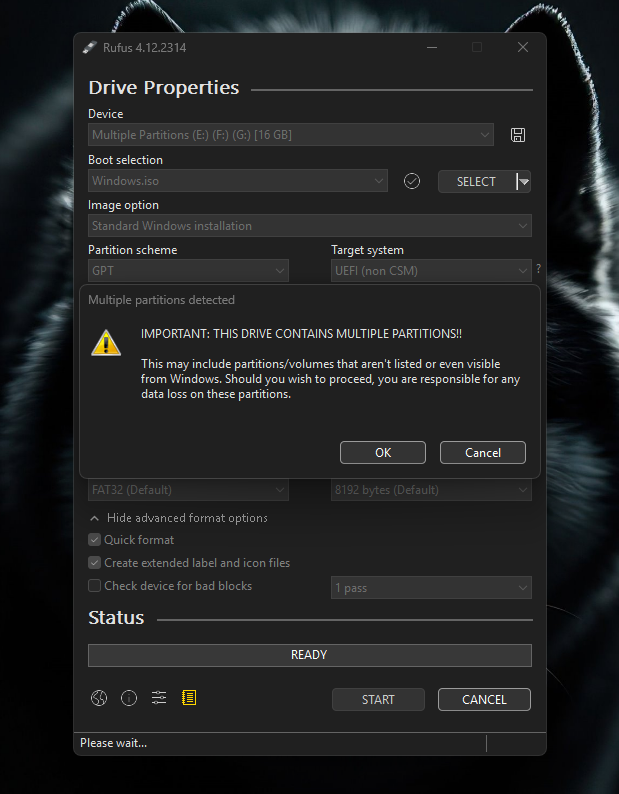
CLICK OK ON ALL DIALOGUE
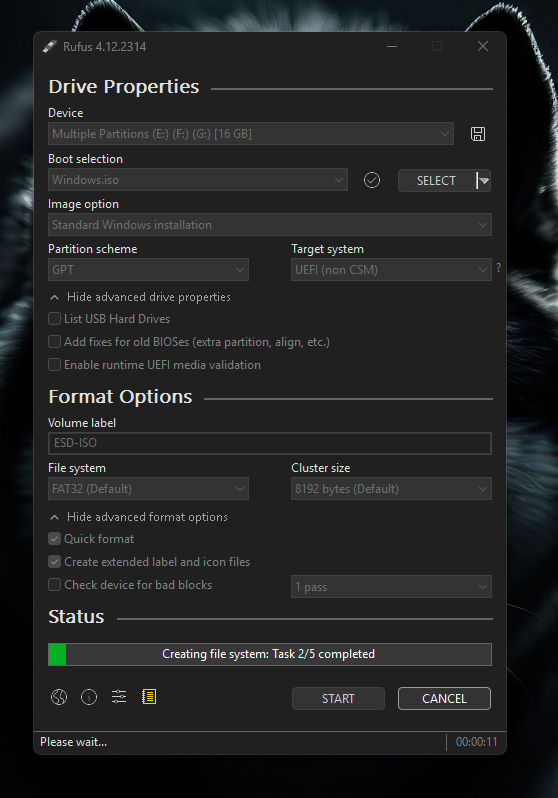
NOW WINDOWS BOOTABLE PENDRIVE MAKING IS STARTED WAIT TILL IT COMPLETES.
AFTER COMPLETETION THIS SCREEN WILL SHOW SIMPLY REMOVE THE PENDRIVE AND START INSTALLING WINDOW IN ANY SYSTEM.